Microsoft 365 Automation Tools for SMBs
Kalamazoo, MI | November 11, 2025
Do you ever feel like you spend more time doing chores instead of actually getting work done?
If so, you’re not alone.
Just think about how many hours you spend in a week doing things like:
Sorting through your emails
Adding and adjusting events in your calendar
Organizing files
Not only are tasks like these time-consuming, but they take mental energy that you could spend working toward more important goals.
Luckily, Microsoft 365 has tools that can automate each of these processes—and trust me, it makes a huge difference.
Let’s take a look at how you can use Microsoft 365 automation to increase your productivity.
How To Automatically Sort Emails in Outlook
Have you ever missed an important email because it was buried among automated alerts, spam, and day-to-day emails? I know I have.
When all of your emails end up in the same place in your inbox, it’s hard to keep track of them. That’s why Outlook uses folders.
What Are Folders in Outlook?
Just like regular folders on your computer, Outlook’s folders let you store your emails in different places.
Now, that probably doesn’t sound too groundbreaking. Folders aren’t exactly a new thing on computers.
But here’s what makes them special: Outlook lets you set Rules for where different emails get sent. That way, you can have Outlook neatly organize your emails for you.
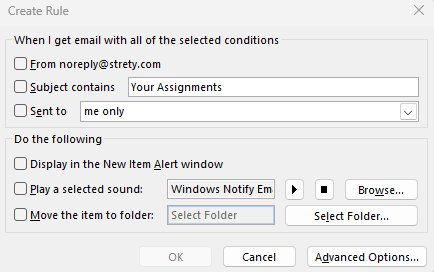
How to Create Rules in Outlook
Creating rules in Outlook is simple. Here’s how to do it:
Right-click on any email.
Click “Rules.”
Select any rules you want in the area under “When I get email with all of the selected conditions”
Select what you want to happen under “Do the following”
Click “Okay”
Pretty easy, right?
Most of the automatic sorting you do can be used with the tools above. That said, there are advanced options you can use if you want to get granular.
The advanced options will let you sort emails by things like:
Specific words in the email’s body, subject line, or email address
Importance and sensitivity
Automatic replies
Whether the email was sent only to you
If you want to get really advanced, you can even set up multiple rules at once.
Getting Started: Move Automated Emails to a Separate Folder
Here’s how to get all of your automatic bills, responses, and notifications sent to a different folder:
Access the “Rules” screen
Click “Subject Contains” and enter text from the subject line of the emails you want to block
Click “Move the item to folder:” and create or choose a folder.
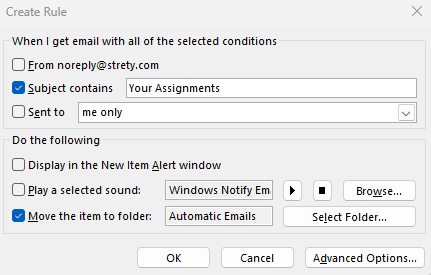
It’s that easy! When you’re deciding on the text Outlook should look for in an email’s subject line, just make sure you choose something that humans wouldn’t normally send (like “automatic reply” or “customer alert”).
How to Automate Sending Emails in Outlook
There are two different ways to automate sending emails in Outlook:
Automatic Replies (AKA “Out of Office” emails)
Outlook Rules
Technically, there are a few more ways to automate emails if you want to get advanced. But for most people, these two ways will be enough.
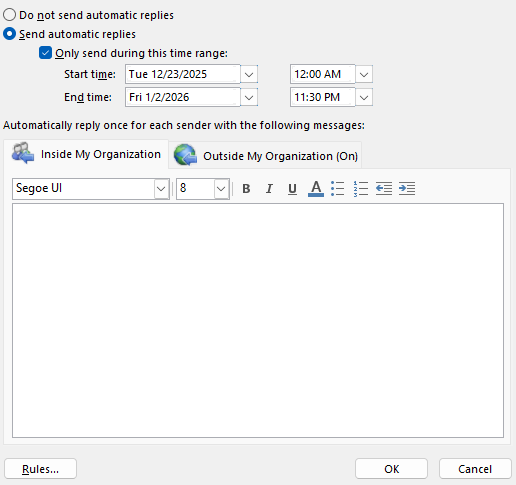
Send Out of Office Emails Using Automatic Replies
This is the easiest way to set up automatic replies in Outlook.
To do so, just follow these 5 steps:
In Outlook, click “File”
Click “Automatic Replies”
Click “Send Automatic Replies”
Choose when to send replies and to whom
Click “OK”
Since this tool is mostly used for being out of office, it’s not the preferred way to automatically respond to people in the long-term (more on that later).
But for most vacations or sick days, it’s everything you’ll need.
Automate Sending Emails Using Outlook Rules
Just like with automatically organizing your emails, you can use Outlook’s “Rules” to automatically send replies.
So how is this different from “out of office” emails? Well, with rules you can be much more precise.
Rules will let you auto-reply to different emails in different ways, using a variety of criteria like:
Sender and CC’d parties
Specific words in email subject or body
Custom date and time spans
Thanks to all the added options, Outlook rules are best for automatic replies other than simple “out of office” emails.
So here’s how to set up automatic replies using Outlook rules:
In Outlook, click “File”
Click “Manage Rules & Alerts”
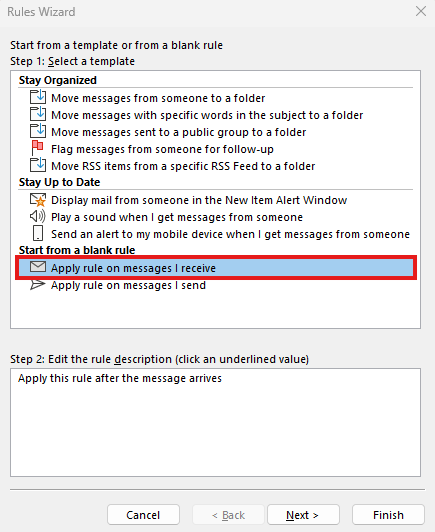
Click “New Rule”
Click “Apply rule on message I receive”
Select the condition(s) to send the automatic reply
Select “reply using a specific template”
Choose the email template you want to reply with
Click “Finish”
Automate Appointment Scheduling with Microsoft Bookings
If you manually set appointments with clients, then you know how quickly they can devolve into a game of phone tag. But with Microsoft Bookings, you can just send them a link and let them choose.
Here’s how you can set up Microsoft Bookings:
Install Microsoft Bookings in either Outlook or Teams by clicking “View More Apps” on the sidebar
In the “Personal Booking Page,” click one of the meeting templates
Edit the booking information (title, description, public/private, etc.)
Click “Save”
Click “Share” to either copy the link or email it directly to clients
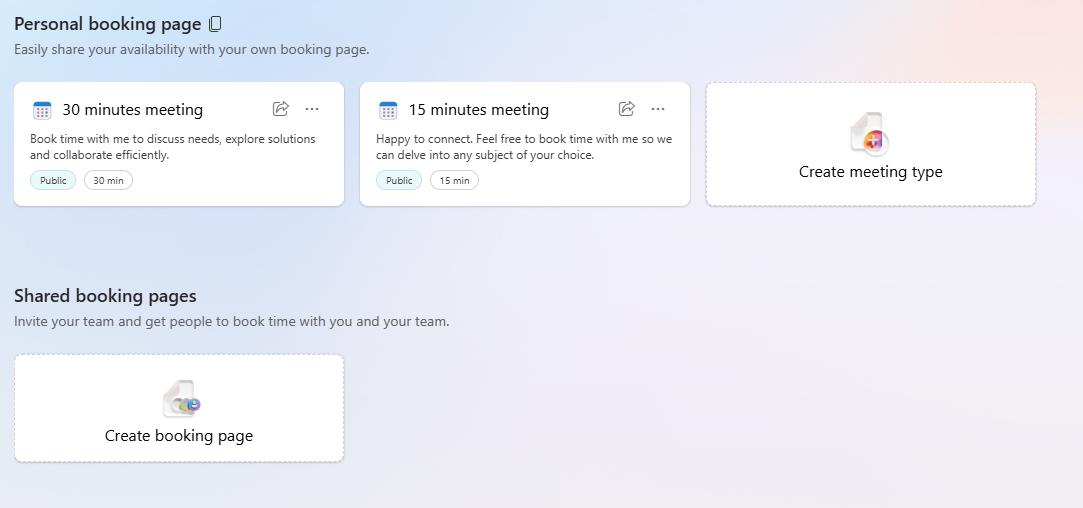
If you want clients to be able to book with your team members, you can also choose Shared Bookings instead. With shared bookings, you can do things like:
Manage staff schedules
Define different services
Allow clients to book with different staff members
Set business hours, availability, and company-wide appointment rules
Automating Solutions with a Managed Service Provider
In this article, we only scratched the surface of what automations can do to clear the way for productivity.
As a Managed Service Provider, our team at Omega helps businesses automate routine tasks by blending:
Strategic planning
Help desk and on-site IT support
Automatic cloud storage and data backups
And more
For more information on how we can help you automate your business and increase productivity, click here to contact our team today!
